 So you just got a new Mac, you’re new to the operating system and you don’t know exactly what to do. Well I am here to help in my multi-part series You and Your New Mac. First things first, we must cover the basics so that you are at least familiar with your new Mac.
Getting Started
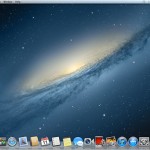
 When turning on your Mac for the first time, you will be greeted by a Welcome screen giving you step by step self-explanitory directions on how to set up your Mac. After these instructions, you should have accomplished a few things. One, you have connected to the internet, two, you have set up an Apple ID or configured an existing one to the computer and three you have customized your settings a bit. After you have done this, you will be greeted by your desktop screen, the central point on the computer. Think of it as downtown in a major city. It has everything on your computer right there. First let’s dive into what we see on the desktop.
Desktop
The desktop, without any windows open, has a few key parts to it. First on the tap is your Menu Bar. This is the central point of every application on the computer. Every app will have it’s own Menu Bar submenus and settings and since every app is different from one another, menu bars for different apps can be similar but never the same. It has a few key functions. First, the Apple logo at the top left is very important. This button will always be available to you no matter the application. From there, you can check out specifications about the computer, open system preference, force quit an application that is not responding, or sleep, shut down and restart the computer. No matter what Mac OS X operating system you are running, the Apple logo is there. Next to that is a series of drop down menus. These may or may not change names when you open an other app but the stuff inside the menus will. My recommendation when it comes to the menubar is to open an app and explore the menu bar in that app then do that with a few more apps, just so you get a feel of how exactly the menu bar changes. At last but not least, there are a series of icons on the menu bar that are very important. The computer will show a few icons there.
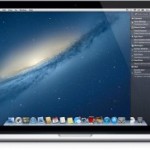 First, starting from the top right moving left is (if you are on Mountain Lion, the newest OS for Mac) what looks like dots next to lines. This is your notification center. The Notification center is where all notifications from different applications on your computer go. If someone sends you an email, it will be seen in the mail app and also in notification center. On a similar note, you can be working on one application when all of a sudden a black box on the top right pops up saying something about something to do with one of your apps. This is an notification. You can click on it to see contents or click ignore if you don’t want to be distracted.
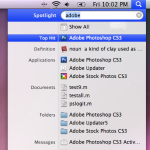 Second, there is an icon that looks like a magnifying glass. This is called spotlight. Spotlight will allow you to search anything on your computer be it a text document, picture, movie, application, song, artist even searching online or on wikipedia. It is a great tool to search for anything on the whim.
Third, your user name will be there. This is the fast user switching icon. Let’s say you have multiple users on your computer. You want to log off of your user and log in to your sons. All you do is click on the username on top and click on your sons user name on the drop down menu. You will need to make an account for your son first of course. I will discuss that topic in the next part of this series so stay tuned.
Fourth, there is the time and date shown. The time can be shown as digital or analog, your choice. You can also access time and date settings directly from the clock.
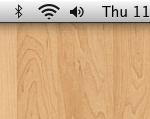 Fifth, if you have a laptop, your battery will be shown. It will show a few things. A battery icon and percentage. If you don’t want it like that, you can change it to not show the percentage. The icon will change slightly to show that it is charging or charged. In addition, there is the volume control after the battery. After that is a wifi indicator, from here you can access wifi preferences and/or see whether or not you are connected and how well you are connected. It will also have a bluetooth icon where you can connect to bluetooth devices. Time Machine is next. This icon looks like a clock with a counter clockwise arrow around it. This will allow you to access Time Machine which, if you have an external hard drive, you can go back to your backups. Time Machine also automatically takes back ups of your computer every so often. Finally after Time Machine, is an icon that looks like a rectangle with a triangle in it. This is AirPlay. If you have an AirPlay compatible speaker you can wirelessly play music from your computer to the speakers. If you have an Apple TV, you can mirror what is on your computer, to your TV.
 Finally, we arrive at the dock. The dock is the main launchpad for your Applications. This is where the basic apps are stored when you first turn on the computer. The dock is the focal point for launching applications. I will go over basic applications in the next installment of this series so stay tuned for that. However, I will tell you now that the dock is divided into three zones. First is the main zone. This is where the applications are stored. You can store a lot of applications on the dock, as many as you want but it will shrink with the more you add to it, so be careful with how many apps you put on it. If you want to change the setting of the dock, check out Apple Menu then go down to dock and click dock preferences. This is where you can change a few settings about your dock. First, you can change the size of the dock. Second, you can change the magnification of the dock. This means that when your cursor is over the dock it will magnify it. This, to me is annoying and I keep it turned off but it may be your fancy. You can also change the position on the screen. There are also a few other settings but they are something that you will know what they mean and something that is based on personal preference. The second part of the dock is the folders section. You can store many different folders here. For example, I have the Applications folder, which shows all my applications whether or not they are actually in my dock or not. I have a downloads folder which shows me all my downloads and I have my documents folder which of course keeps my documents. Third and finally is the trash. This is where all unwanted files go. The trash will be discussed in greater detail in a later installment of this series.
So here it is, your new Macs desktop. It truly look amazing doesn’t it? We will discuss a lot more in detail of your computer so you will be good to go in no time. Enjoy your new Mac and please join me next time for the next installment of the series. Next time I will be discussing all the settings of your computer. After that, I will discuss the stock applications on your new Mac in detail and finally I will help you find applications for any kind of person out there.
Thanks for reading,
Joe
Images courtesy:
First Image:
http://www.pcmag.com/slideshow_viewer/0,3253,l=294141&a=294141&po=1,00.asp
Second: http://www.guidebookgallery.org/articles/interviewwithjohngruber/pics/welcome
Third:
http://nnucomputerwhiz.com/run-osx-in-ubuntu-with-qemu.html
Fourth:
http://www.digitaltrends.com/computing/mac-os-x-mountain-lion-review-hands-on/2/
Fifth:
http://lifehacker.com/5787127/brush-up-on-your-spotlight-search-skills-and-settings
Sixth:
http://www.adiumxtras.com/index.php?a=xtras&xtra_id=5756
Seventh:
http://mac.softpedia.com/progScreenshots/Mountain-Lion-Dock-Screenshot-121816.html
